Effective Screenshots without Power Tools
(This post was originally published to Medium in 2015. Some tools have changed since then, but the principles still hold up.)
You’re filing a bug because you think this product is worth making better. So give the developer the information they need to understand the problem. You can file better bugs with this one simple trick: a screenshot! Sure, some bugs are deep in the SDK and there is nothing to take a picture of. But for most issues — in your code, in a beta app you’re taking for a spin, in Apple’s apps and OSes—a good screenshot can be worth a lot of words. So, what makes a good screenshot?
- Shoot
- Crop
- Annotate
- Obfuscate
- Scale
Let me show you how to do all of this, with tools you already have on your Mac. (The gremlins in my head are arguing about whether to give you a bunch of alternate tips along the way or just let me show you one reliable way. Perhaps the gremlins can be content to include them in parentheses.)
 Crosshairs with coordinates
Shoot
The first step to getting a good screenshot is to get a screenshot. I’m sorry if this sounds dumb, but they are useful way more often than you think. And they’re sometimes difficult to go back and get later. Some days I take a screenshot every time I see anything funny. At the end of the day I can drag them into the trash. But when a screenshot saves me or the developer an hour of trying to figure out what the heck happened, every extra keystroke that week was worth it.
- On a Mac, Shift-Command-4 turns your mouse cursor into crosshairs. Drag out the region you want to capture, and the file is saved to your Desktop. (Shift-Command-4, tap the space bar, then click on a window or menu to automatically capture that region. Add Option to the click to omit the window’s shadow. Shift-Command-3 to capture all screens — handy when things are so frozen even the mouse won’t cooperate. To show the cursor and do other custom screenshots, check out the Grab app, also pre-installed on your Mac.)
- In the iOS Simulator, Command-S captures a screenshot of each open device window, including Apple Watch.
- On iPhone, iPod, or iPad, hold down the home button and tap the sleep/wake button. That was easy — except it’s still on your device. I’d like to introduce you to an app that’s on every Mac but nobody seems to know about. Connect your iDevice to a USB port on your Mac. Now launch the Mac app Image Capture.
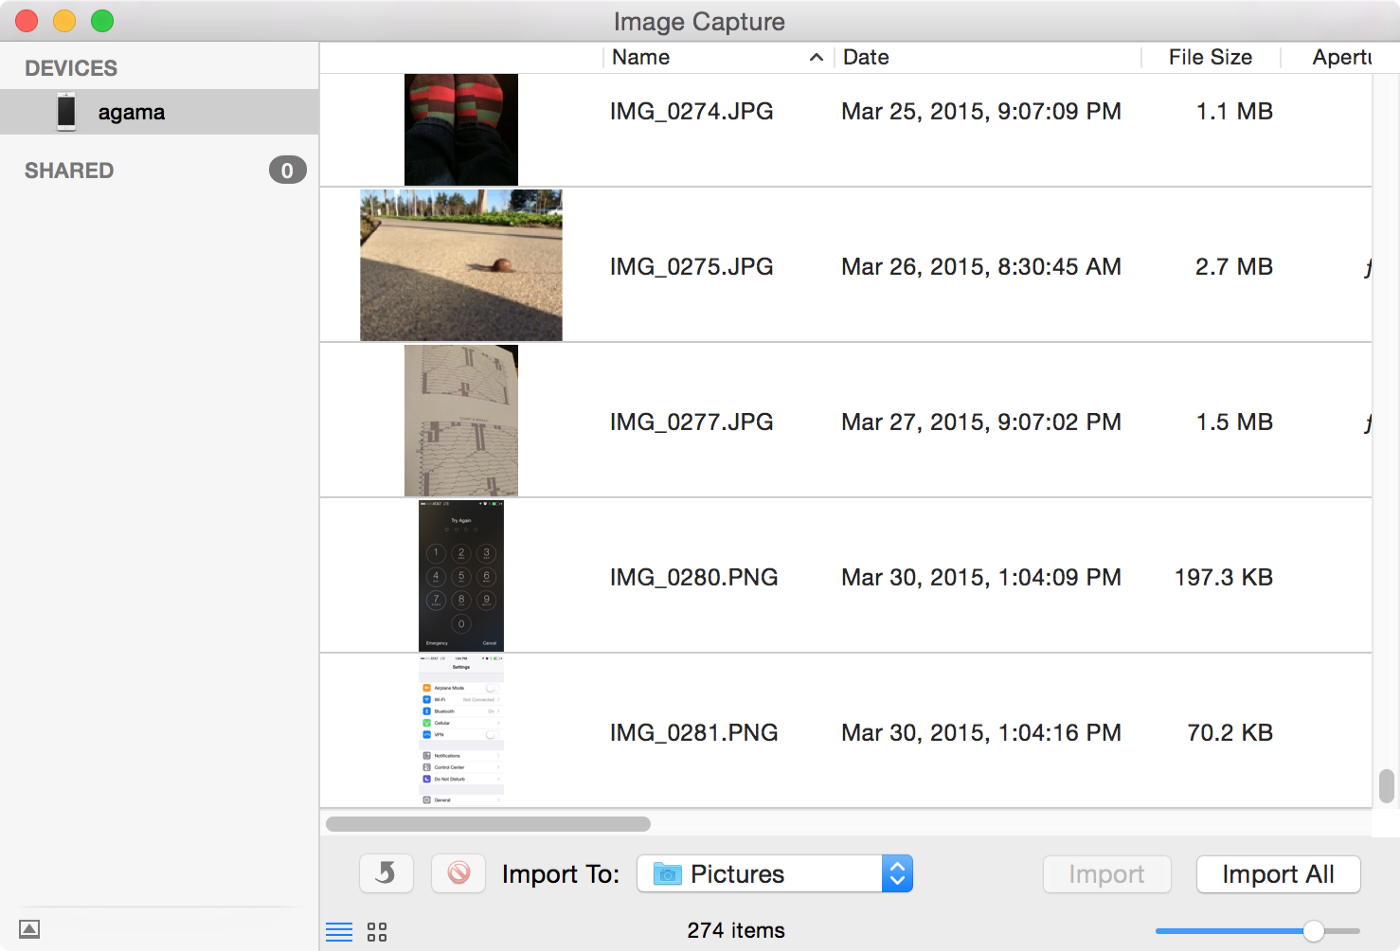 Image Capture, the app you didn’t know you had
In the left sidebar, select your iDevice. Here’s a list of all the images on this device. You probably want the most recent one or three. Select them and import them. Ta-Da! Except you probably forgot to change the destination, so they’ve gone to your Pictures folder instead of the much more visible and easy-to-clear Desktop. (Yes, you could also use AirDrop if your device is new enough, or email if it happens to be set up, but bugs are sometimes found on an old device that has recently been wiped.) So, no matter where you took the screenshot, it’s now sitting on the Desktop of your Mac. Open it in Preview, where we will polish it up to communicate even more clearly.
 Preview app icon
Crop
If the bug is in a toolbar button, you probably don’t need the entire 1024 x 768 pixel window. Drag to select the portion you want to keep and press Command-K. This is not always useful. When in doubt, leave some context around the issue.
Annotate
 Show the Markup Toolbar to get at all the useful annotation tools.
If the relevant part of the image is tiny — but you’ve cropped loosely to preserve context — doodle on the image to draw the audience’s eye to the pixels you’re concerned about. Select a shape tool and a square or an oval will leap onto the canvas. Adjust its location and proportions with the drag handles, line weight and color in the annotation toolbar.
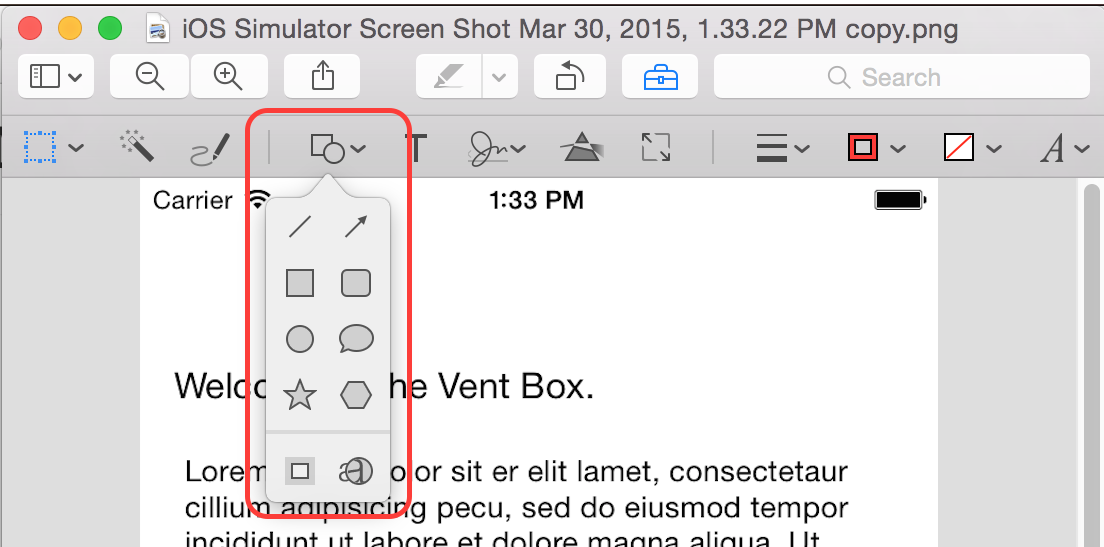 I haven’t found a good reason to use ☆ yet, but I’ll keep trying.
(To accentuate alignment issues, use the pen tool to draw a line on the image. Then shift drag one end to force the line perfectly horizontal or vertical.)
Obfuscate
Sometimes a screenshot will include private info that isn’t relevant to the bug. The developer doesn’t need to know what you were venting about, only that the vent was misaligned with the introductory text.
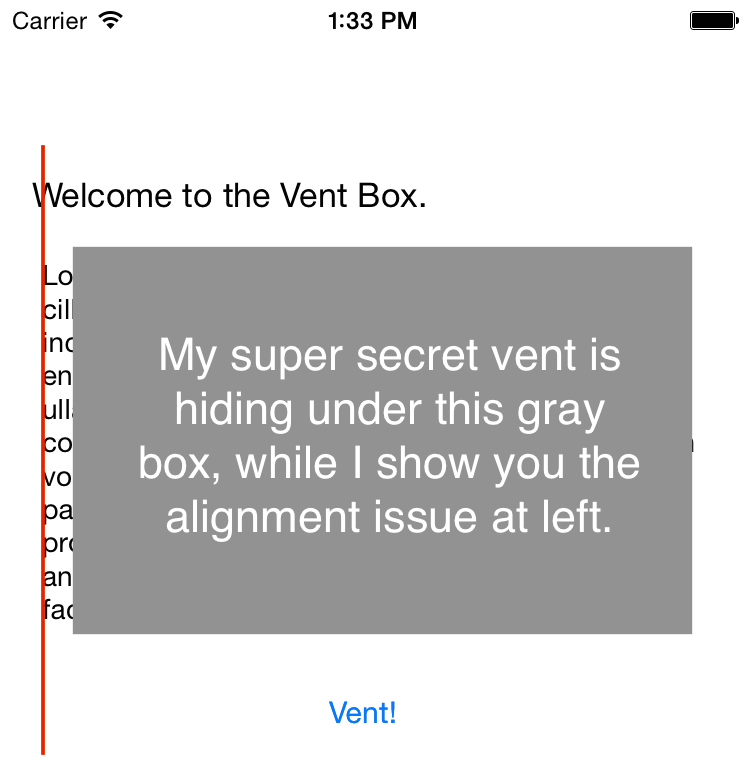 Rectangle of redaction over some misaligned text
Use the annotation tools to draw a shape over the private information, and give it a solid fill. (In some weird cases, annotations are ignored by image viewers, so if this is really private, take a screenshot of the annotated image, and proceed with that image.)
Scale
A retina iPad Air has 2048 x 1536 pixels. A fullscreen image from that will overflow the main display of the computer where I’m writing this. So if the exact pixel details aren’t essential to your story, consider scaling the image. Choose Adjust Size… from the Tools menu.
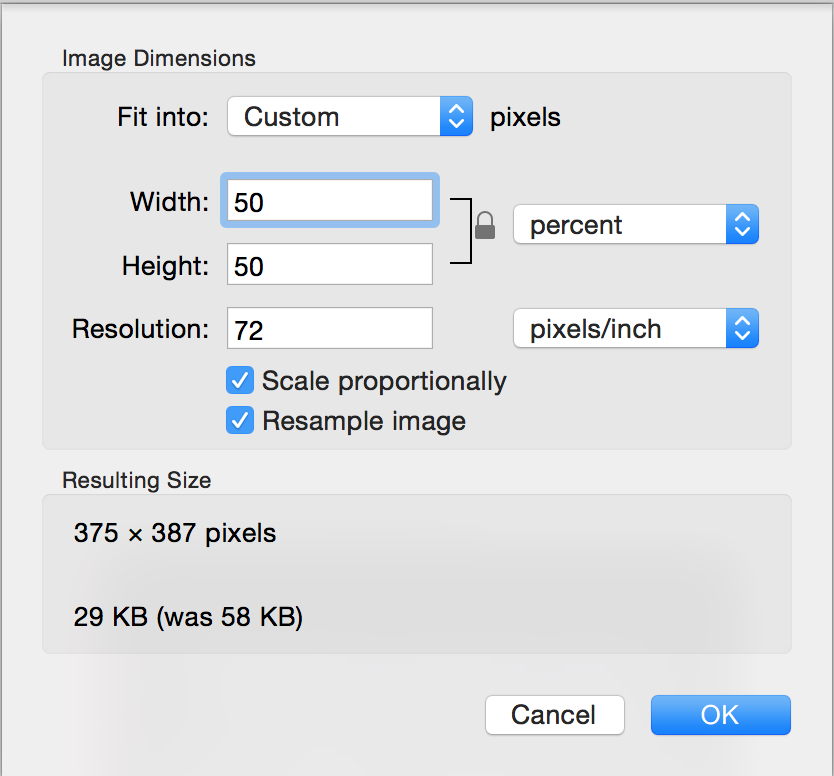 Adjust Size sheet
With the ratio locked and the units set to percent, change the Width to 50 or 25, and the Height will follow and your image will be much more manageable.
More
The gremlins have some more ideas for you…
To capture a flicker, or bad scrolling, or some other moving issue, take a moving picture. QuickTime can capture most anything on the Mac, including simulator screens. (You may also be able to QuickTime capture from a device connected to USB, but I haven’t actually tried it.)
Maybe the bug involves the way the device is held. Use another device to take the photo of the device and your hand.
Recap
Take screenshots! Include them in your bug reports. Bonus points for annotating them.
All images included in this document were prepared with the tools described above.